How to make light room presets on desktop
When you are looking at your Instagram feed and want your feed to be consistent no matter what the image you have taken you need to ensure that you are editing all of your images in the same way.
The best way to do this is by creating your own custom Adobe Lightroom presets. Once you have an understanding of your own style or the type of colour scheme you want to aim for you are ready to start practicing.
This guide will show you how to create your own Adobe Lightroom presets.
You may also want to purchase our own presets and make them your own with a few touch ups. Click here and we will show you how. This is a much easier way to get Light room presets.
[top_rated_products per_page=”2″ columns=”2″ orderby=”date” order=”ASC”]
You can also learn how to sell your presets here and make money from them.
Software to use
In order to create your own presets and edit your images you will need to download Light room CC. You can do this either on your desktop (this option will require you set up a Light room subscription which will cost around £20 per month) or you can do this on your mobile for free in the app store. We definitely recommend using the desktop version. It is a little bit trickier to learn, but once you have you will not look back. The mobile version is great for using on the go when you take quick images. You can download the Lightroom software here.
How to use presets in Adobe Lightroom
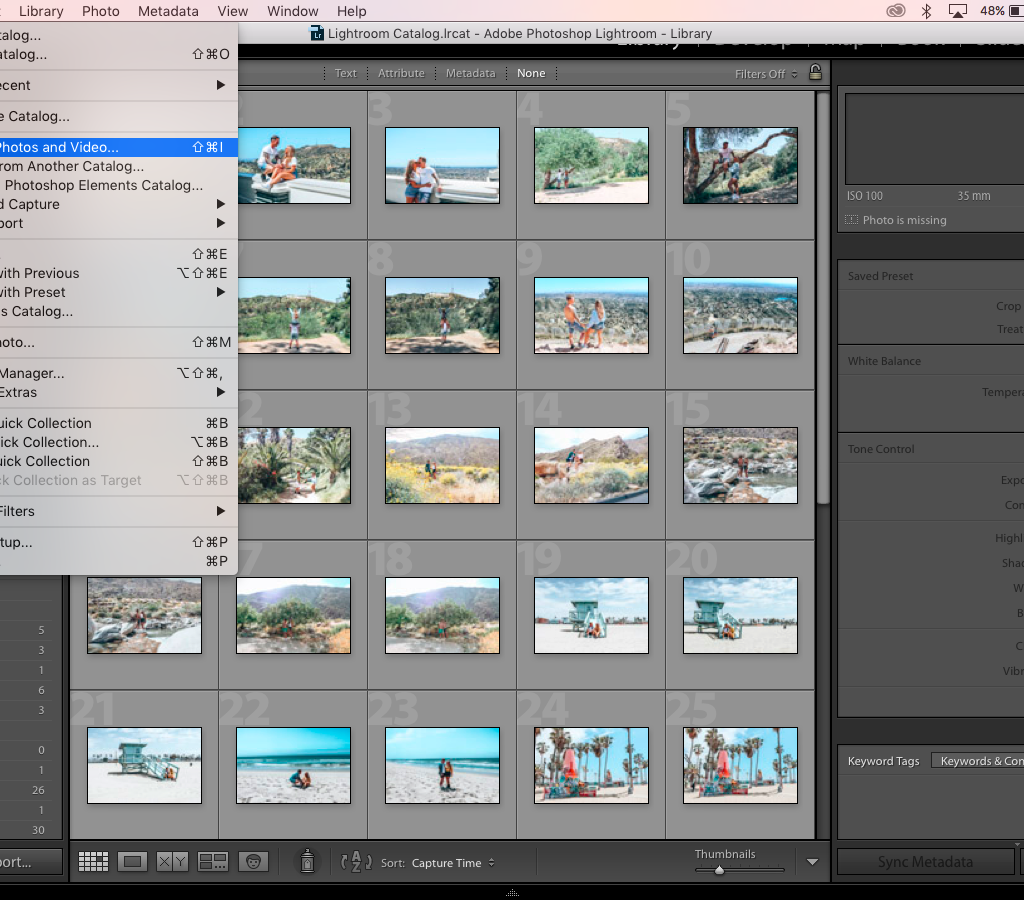
Import your image into the library
Click on file and then import photos then select the image or images that you want to import into your light room library. Once you have down this you are ready to select the desired image and begin to develop.
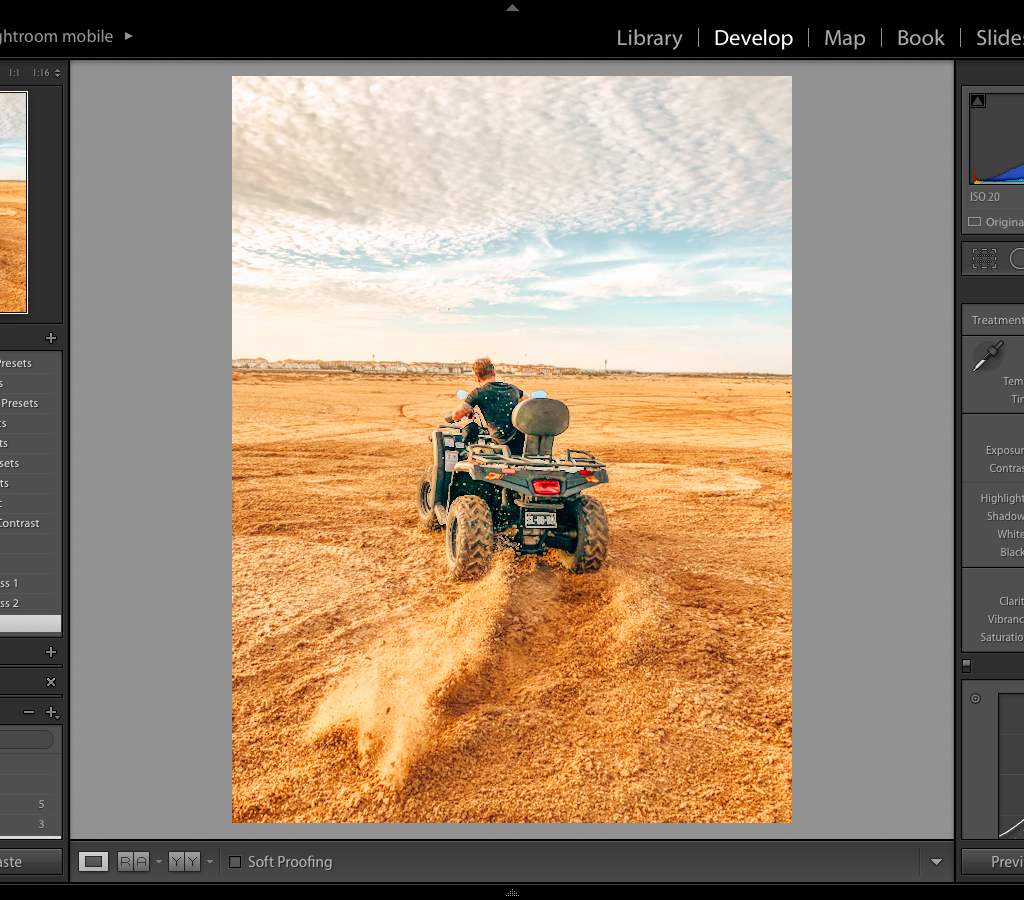
Developing the image
In order to begin to edit your image you will need to select develop in the top right hand corner. Once you have clicked this you can see the develop mode controls are displayed on the right side of the screen. This will be where you can use the tools provided to create awesome edits.
We recommend having a play around with each tool first of all to see the changes it makes to your image and then undo the change so that you can get a feel for what each tool is for.
Tools
Once you have had a chance to explore each tool you can get ready to start creating the desired effect for your image.
Let’s take a look what each tool can do for your image.
Colour tools
Change the temperature to make the image warmer or cooler or change the tint to add a colour tint to the image.
Tone tools
Exposure will open up the lighting or decrease the lighting on your image. Contrast is the contrast between the light and dark on the image.
White and black will either show case the white and black or reduce the colours in the image.
Presence tools
Clarity will clarify the objects in the image. YO can also add vibrance and saturate the colours in the image.
Region
This tool will allow you to allocate edits to a specific part of your image.
Colours
At the bottom of the developing page you can see the colour section. This section is really important to add, change or develop colour in your image. This could be the colour in the background or even your skin or hair colour. Use the tab to pull along to get the desired colour effect and then use the saturation tab to edit the colour to get the exact effect and colour you are looking for.
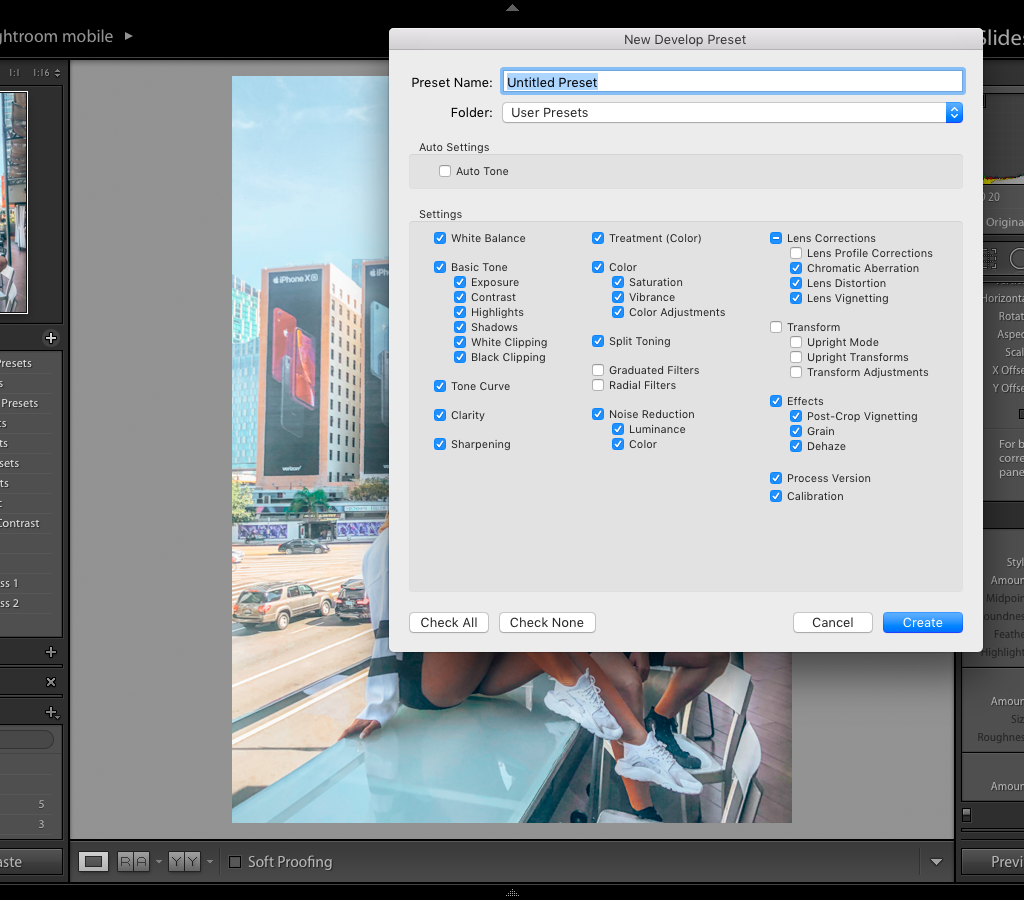
Creating your preset
Now you have had a chance to use all of the tools in the develop mode and play through trial and error to get your desired image effect and are happy with the final result you are ready to make your preset.
In order to create your preset you will need to click the + button on the left hand side on the preset section to add the preset you have created.
Choose a name for your preset and click create.
Your preset is now saved on the left hand side in the preset tab and is ready to use.
Using your preset
Now your preset is developed and saved it can now be used every time you edit a new image. All you will need to do is go back to the library and import the image exactly how we showed you above. Click develop mode again and now look for the presets tab on the left hand side of the page. You can now click through all of the presets that you have either purchased or created to pick the preset that best suits your image.
Once you have selected the preset you may need to make a few adjustments to the colour or image to ensure that the editing matches this image.
Keeping your presets consistent
Now you have created a few presets it is important to make sure you stick to the same theme to keep your Instagram and images consistent. You can do this by really homing in on what types of image style you want.
Do you want bright colourful images?
Do you want a grey scale image with a pop of colour?
Do you want to cinematic images?
Do you want crystal blues and leafy greens?
This is something you can think about and then make sure your presets are the same in these area.
Take a look at our custom presets
Looking for awesome styles that keep a feed consistent is a great way to learn. It took us a long time to practice to make our presets exactly how we wanted them. You can purchase our presets here and either keep them exactly the same or edit them slightly to create your own presets. This is a much easier way of keeping your feed consistent.
Now that you have learnt how to make your presets on Lightroom, you can now learn how to sell them and make money from your custom designs. Find out more here.
 How to sell Lightroom presets